Happy Freebie Friday!
I am so sorry that I managed to get so off track with my Freebie Friday release. the past 2 weeks have been spent cleaning and getting my son ready for secondary school which he starts next week! I cannot believe how quickly time has passed. Also, a lot of time has been spent finishing off WIP projects so I can create PDF’s for my ETSY store.
Needless to say, I became very lax with the administrative side of things. I will remedy this issue by spending the rest of the week focusing on writing posts, which will primarily be for my Disney’s Princess and the Frog series – FINALLY!! It feels so good getting caught up on things. My aim is to never allow my unfinished tasks and projects to ever get this long again. It will be hard but I will limit the number of projects that I work on at a time to just two and will not start a new project until one of those is completed.
This post is so late that today I will be releasing TWO freebie patterns – King Bob-omb and Wiggler. Each will be released in a separate post like I usually do. These are the last two releases will be in this first Super Mario set. The second Super Mario set will start its release in November – the exact date has yet to be confirmed.
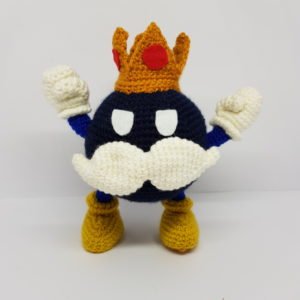
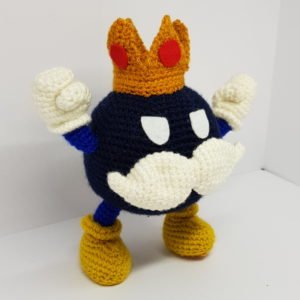
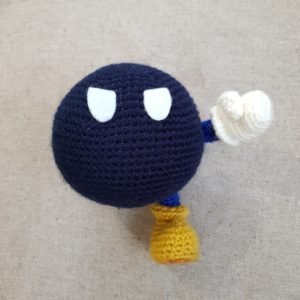
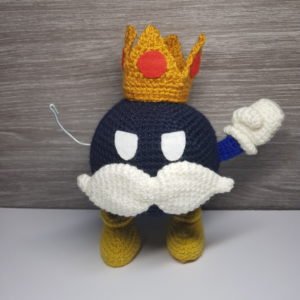
In terms of difficulty, this King Bob-omb pattern is on the more complicated side of things in comparison to the other patterns in this series. This is why he is the penultimate pattern to be released. As you can see from the picture the arms and legs will require the use of a wire for him to stand and gesture his arms.
The approximate measurements using DK yarn and 3mm hook are 7 inches height, 7 inches width and 4 inches length/depth.
Materials required:
- Navy DK yarn
- White DK yarn
- Electric Blue DK yarn
- Golden/Mustard DK yarn
- Yellow DK yarn
- Fibrefill
- 3mm hook
- Yarn needle
- Scissors
- Pliers
- 2-3mm craft wire
- Felt glue
- Red felt
- White felt
Abbreviations:
- MR#—MAGIC RING WITH SPECIFIED NUMBER OF SINGLE CROCHETS (E.G. MR6)
- SC—SINGLE CROCHET (DOUBLE CROCHET UK)
- INC—INCREASE
- DEC—DECREASE (I USED INVISIBLE DECREASE METHOD)
- *_______* X# — REPEAT SEQUENCE WITHIN THE ASTERISKS THE SPECIFIED NUMBER OF TIMES (E.G. •*SC, INC* X6)
- CH#—CHAIN SPECIFIED NUMBER OF STITCHES
- BLO—BACK LOOP ONLY
- FLO—FRONT LOOP ONLY
- CH1T—CHAIN ONE STITCH THEN TURN YOUR WORK
- CC—COLOUR CHANGE
- SS—SLIP STITCH
- FO—FASTEN OFF
BODY
USING NAVY YARN
- MR6
- 6INC (12)
- *SC, INC* X6 (18)
- *2SC, INC* X6 (24)
- *3SC, INC* X6 (30)
- *4SC, INC* X6 (36)
- *5SC, INC* X6 (42)
- *6SC, INC* X6 (48)
- *7SC, INC* X6 (54)
- *8SC, INC* X6 (60)
- *9SC, INC* X6 (66)
- *10SC, INC* X6 (72)
- 72SC (72) = 12 ROWS
- *10SC, DEC* X6 (66)
- *9SC, DEC* X6 (60)
- *8SC, DEC* X6 (54)
- *7SC, DEC* X6 (48)
- *6SC, DEC* X6 (42)
- *5SC, DEC* X6 (36)
- *4SC, DEC* X6 (30)
- *3SC, DEC* X6 (24)
- *2SC, DEC* X6 (18)
- *SC, DEC* X6 (12)
- 6DEC (6)
- FO
SHOES (MAKE TWO)
STARTING WITH MUSTARD YARN
- CH3
- 2INC, CH1T
- 4SC, CH1T (4)
- INC, 2SC, INC, CH1T (6)
- 6SC, CH1T (6) = 5 ROWS
- DEC, 2SC, DEC (4)
- CC YELLOW
- CH1, 24SC AROUND PERIMETER (24)
- BLO: 24SC (24)
- 9SC, INC, SC, INC, 12SC
- 10SC, INC, SC, INC, 13SC
- 28SC
- 11SC, 2DEC, 13SC
- 10SC, 2DEC, 12SC
- 7SC, CH2, SKIP 8STS, 9SC
- *2SC, DEC, 3SC, DEC* X2
- FLO: 14INC
- 28SC
- 14DEC
- *SC, DEC, 2SC, DEC* X2
- CC ELECTRIC BLUE
- FLO: 10SC (10)
- 10SC (10) = 4 ROWS
- FO
THUMB (MAKE TWO)
USING WHITE YARN
- MR6
- 6SC (6) = 4 ROWS
- FO
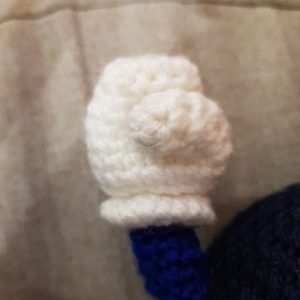
HAND (MAKE TWO)
USING WHITE YARN
- CH5, *3SC, 3IN1* X2 (12)
- 12SC (12)
- *4SC, 2INC* X2 (16)
- 16SC (16) = 3 ROWS, ON LAST ROW OF 16SC, 6SC Around THUMB
- 22SC (22)
- DEC, 16SC, 2DEC (19)
- 4SC, DEC, 8SC, 2DEC, SC (16)
- *2SC, DEC* X4 (12)
- FLO: 12INC (24)
- 12DEC (12)
- CC ELECTRIC BLUE
- FLO: 12SC (12)
- *4SC, DEC* X2 (10)
- 10SC (10) = 4 ROWS
- FO
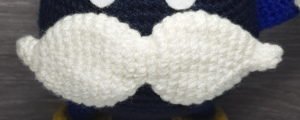
MOUSTACHE
USING WHITE YARN
- MR4
- INC, 3SC (5)
- INC, 5SC (6)
- *INC, SC* X3 (9)
- *INC, 2SC* X3 (12)
- INC, 7SC, INC, 3SC (14)
- INC, 8SC, INC, 4SC (16)
- INC, 9SC, INC, 5SC (18)
- INC, 10SC, INC, 6SC (20)
- 20SC (20) = 3 ROWS
- 6SC, DEC, 2SC, DEC, 8SC (18)
- DEC, 3SC, DEC, 2SC, DEC, 3SC, DEC, 2SC (14)
- DEC, 2SC, 3DEC, 2SC, DEC (9)
- INC, 2SC, 3INC, 2SC, INC (14)
- INC, 3SC, INC, 2SC, INC, 3SC, INC, 2SC (18)
- 6SC, INC, 2SC, INC, 8SC (20)
- 20SC (20) = 3 ROWS
- DEC, 10SC, DEC, 6SC (18)
- DEC, 9SC, DEC, 5SC (16)
- DEC, 8SC, DEC, 4SC (14)
- DEC, 7SC, DEC, 3SC (12)
- *DEC, 2SC* X3 (10)
- *DEC, SC* X3 (8)
- DEC, 4SC (6)
- DEC, 3SC (4)
- FO
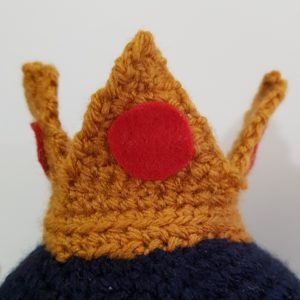
CROWN BASE
USING GOLD/MUSTARD YARN
- CH40
- IN THE FIRST STITCH TO CREATE A CIRCLE: 40SC (40)
- BLO: 40SC (40)
- 40SC (40) = 2 ROWS
- SS to FO
CROWN PEAKS (REPEAT FOUR TIMES)
USING GOLD/MUSTARD YARN
Attach yarn to the top of the crown then CH1
- 10SC, CH1T (10)
- DEC, 6SC, DEC, CH1T (8)
- 8SC (8)
- DEC, 4SC, DEC, CH1T (6)
- 6SC (6)
- DEC, 2SC, DEC, CH1T (4)
- 4SC (4)
- DEC, DEC, CH1T (2)
- DEC
- FO
ASSEMBLY:
- I place the eyes first so that I could get the positioning of the arms and legs correct.
- Insert the wire for the left arm and leg through the completed King Bob-omb body. Fold over the ends so that are no exposed sharp edges.
- Place the arm and legs over the wires and whip stitch to attach to the body. Repeat for the right side.
- Stitch the thumb down and to the palm to create a fist. Do this for each hand so that you have a left side and a right side.
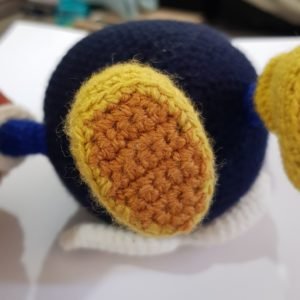
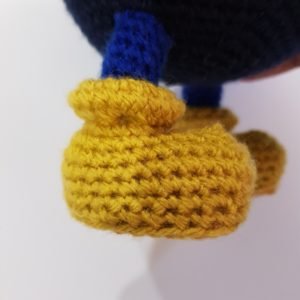
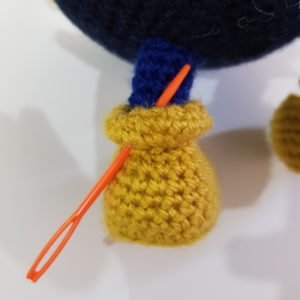
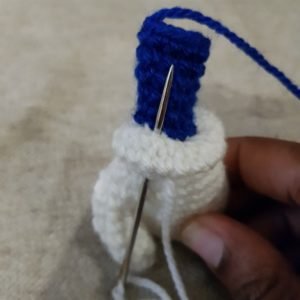
- Using a needle stitch the cuffs on the arms and legs closed so that it doesn’t look puffy (hopefully that makes sense).
- Attach the moustache as pictured
- Glue red felt circles onto the crown and whip stitch to the top of the head as pictured.
You’re King Bob-omb is now complete! I would love to see any completed projects that you make using any of my patterns. If you have any trouble at all using any of my patterns, I am always available and happy to assist in any way that I can. you can contact me via facebook, Instagram or email (onescreativemind@outlook.com).
I am now off to write the next and last post of this Phase 1 set – Wiggler. At the end of the post, I will reveal which eight characters will make up my Super Mario Phase 2 set.
Happy crocheting!
Chantelle X



This is series i have ever seen ! !
Very cute! Thanks for pattern!